Remove Nextyourcontent.com pop-up ads (2021 Removal Guide)

Nextyourcontent.com pop-up virus sends ads daily
Contents
Nextyourcontent.com pop-up virus is an adware-type program that sends daily push notifications for Windows, Mac or Android users. Typically, it does so after gaining permissions to send notifications for the user. The adware fills the right side of the device screen with various third-party ads. The site might send ads from various different subdomains, such as 0.nextyourcontent.com or 9.nextyourcontent.com. Cybersecurity experts do not recommend clicking on these ads as they can lead to potentially dangerous websites. Continue reading to discover how to remove these ads for good.
The so-called Nextyourcontent.com virus will start displaying pop-ups promoting various third-party websites, games, adult sites, fake alerts or software updates and other third-party ads. These advertisements are usually displayed in victim’s native language. For instance, you may receive an ad promoting “earn-money-quick strategies” who already “worked” for someone from your town. Such ads are accompanied by pictures of someone next to expensive car.

We do not recommend interacting with Next Your Content ads. If you click on them, you will be taken to external third-party sites with content that may be untrustworthy or even dangerous. For example, you might be convinced to register on highly questionable sites or download suspicious programs or add-ons. Inexperienced computer users might be tricked into installing various browser extensions (also known as browser hijackers) that change primary homepage and search engine settings.
Threat Summary
| Name | Nextyourcontent.com pop-up adware |
| Type | Push notification ads, pop-up adware |
| IP address | 104.18.62.28 |
| Signs of infection | Annoying pop-up ads appearing on the right side of the screen, promoting various third-party websites. |
| Danger | Might suggest advertisements that lead to untrustworthy or misleading websites |
| Removal | Remove by revoking push notifications permissions and removing suspicious software from computer. Use instructions given below. |
Keep in mind that the described adware can display misleading ads from several different subdomains. Therefore, you must keep that in mind while cleaning your browsers’ settings.
Websites that function similarly are SaveFrom.net, Y2mate.com, Googlo.co and many others, so if you accidentally visit them, never allow them to send you push notifications.
As mentioned earlier, this annoying browser addition might force you to visit some suspicious online resources that security experts recommend avoiding. Therefore, if you have noticed these ads on your screen, you may want to take actions and clean your browsers as well as computer system immediately. Learn how to remove Nextyourcontent.com pop-up virus securely.
Tips to avoid push notification viruses
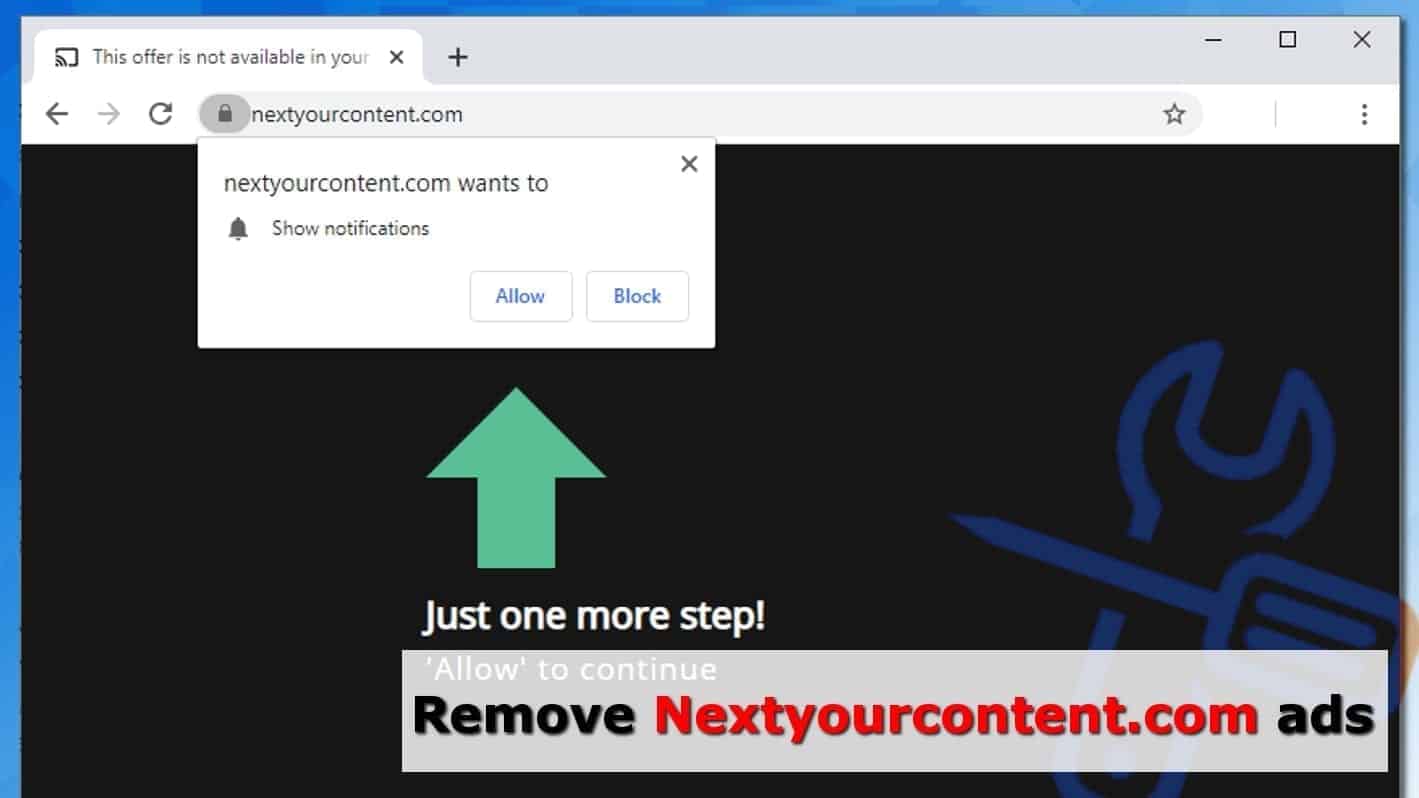
So-called push notification viruses aren’t malicious, but they can be challenging to remove for inexperienced computer users. People typically invite them in their computer systems by clicking “Allow” on alert that says:
Nextyourcontent.com wants to Show notifications
Press tap the Allow button to continue.
If you want to avoid NextYourContent ads, do not click on Allow. If you already did, follow the instructions explaining how to reverse the configured settings manually.
In other cases, people start seeing annoying push notifications or pop-up ads after installing adware-type software on the system. You can avoid that by choosing Custom or Advanced installation method when installing free programs downloaded from the Internet. Then deselect all extra programs suggested to you.
To remove nextyourcontent.com ads on Android, Windows or Mac, you will need to alter notifications settings in the browsers you’re using. The next step is to remove suspicious software such as adware from the computer system. Use the guide provided below to do it yourself.
Complete Nextyourcontent.com removal by investing some free time into the matter, although you can also employ a trustworthy anti-malware software to do it for you. If you do not have such one, you might consider reading software reviews on our site.
Remove push notifications permissions
Google Chrome (Desktop)
Follow the given steps to delete Nextyourcontent.com permissions to send you notifications via Google Chrome browser. The provided guide is designed for both Mac and Windows users.
TIP: You can access Notifications settings by typing chrome://settings/content/notifications in the URL bar and pressing Enter. Or, you can use the following guide.
- In Chrome browser, click on the three dots in the top-right corner to launch menu, then choose Settings.
- In Settings, scroll down until you see Advanced option. Click on it.
- Now find Privacy and Security pane and click on Content Settings.
- Go to Notifications.
- Locate the URLs that deliver you ads, right-click the three dots next to them and choose Remove.
Firefox
Use the provided steps to stop receiving notifications from Nextyourcontent.com on Mozilla Firefox.
- Open Firefox menu by clicking on the three bar icon at the top right corner of the screen.
- Choose Options, then click on Privacy & Security.
- Scroll down to Permissions and click on Notifications. Click Settings button next to it.
- Find the URL that delivers you ads, click on it, then click the Allow button and change it to Block. Repeat with all suspicious URLs.
- Click Save Changes to confirm.
Microsoft Edge
If you wish to remove push notification permissions for Nextyourcontent.com on Microsoft Edge, follow the instructions presented below.
- Open MS Edge menu by clicking on the three dots at the top right corner of the screen, then choose Settings.
- Click on Advanced tab.
- Click Manage permissions under Website permissions.
- Find the suspicious URLs, hover your mouse over them, then an X will appear next to it. Click on it to clear permissions for the site.
Safari (Mac)
You can revoke push notification permissions for Nextyourcontent.com on Safari using these easy steps.
- Open Safari, then click on Safari tab in the menu bar (upper-left corner of the screen) and choose Preferences... from the menu.
- Open Websites tab.
- Here, select Notifications from the pane on the left side.
- Find the suspicious URL and click the Allow option next to it, change it to Deny.
Google Chrome (Android)
Use the given method to remove Nextyourcontent.com push notifications permissions on Google Chrome (Android devices).
- Open Chrome menu by tapping on the three dots. In menu, tap Settings option.
- In Settings, go to the Advanced area, here, tap on Site Settings.
- Go to Notifications.
- Locate the URL that delivers you ads, click on it, then select Clear & Reset. Click Clear & Reset once again to confirm. Repeat with all suspicious URLs.
In addition to removing granted permissions, we strongly recommend performing a standard and easy system clean using these instructions:
OUR GEEKS RECOMMEND
Our team recommends a two-step rescue plan to remove ransomware and other remaining malware from your computer, plus repair caused virus damage to the system:
STEP 1. REMOVE AUTOMATICALLY WITH ROBUST ANTIVIRUS

STEP 2. REPAIR VIRUS DAMAGE TO YOUR COMPUTER
GeeksAdvice.com editors select recommended products based on their effectiveness. We may earn a commission from affiliate links, at no additional cost to you. Learn more.
Nextyourcontent.com ads Removal Tutorial
To remove the unwanted program from your computer, use these instructions below to uninstall associated programs or apps from your Windows or Mac computer. Then scroll down for instructions how to clean each affected web browser individually.
Remove Nextyourcontent.com ads from Windows
Windows 10/8.1/8 users
Click on the Windows logo to open Windows menu. In search, type control panel and select the matching result. Then go to Programs and Features.

Windows 7 users
First, open Windows menu by clicking on the icon in the lower left corner of the screen. Then go to Control Panel and find section called Programs. Click on the Uninstall a program option under it.
Windows XP users
In Windows XP, click Start > Control Panel > Add or Remove Programs.
Uninstall unwanted programs
Once in Programs and Features, look through the list of installed programs. You can click on Installed on tab to sort the programs by their installation date.
Right-click on suspicious programs you can't remember installing and choose Uninstall. Follow instructions provided by the Uninstall Wizard, click Next and finally Finish to uninstall the unwanted program from your PC.
Remove Nextyourcontent.com ads from Mac
- Click on Finder.
- Go to Applications folder.
- Look for suspicious applications you can't remember installing. Right-click them and select Move to Trash.
- After moving all suspicious apps to Trash, right-click the Trash bin in Mac's Dock and select Empty Trash.
Remove using INTEGO ANTIVIRUS for Mac (includes scanning for iOS devices). The one-of-a-kind security suite provides VirusBarrier X9 real-time protection against Mac and Windows-based malware, removes existing threats and scans for malware in popular e-mail clients. Includes NetBarrier X9, an intelligent firewall for home, work and public connections.
Remove Nextyourcontent.com ads from Google Chrome
Remove suspicious Chrome extensions
- Open Chrome and type chrome://extensions into address bar and press Enter.
- Here, look for suspicious extensions, and Remove them.
- Don't forget to confirm by pressing Remove in the confirmation pop-up.
Change Start Page settings
- In Chrome address bar, type chrome://settings and press Enter.
- Scroll down to the On startup section. Check for suspicious extensions controlling these settings, and Disable them.
- Additionally, you can set browser to Open a specific page or set of pages via these settings. Simply choose this option, click Add a new page, enter your preferred URL (f.e. www.google.com) and press Add.
Change default search settings
- In Chrome URL bar, type chrome://settings/searchEngines and press Enter. Make sure you type searchEngines, not searchengines. Additionally, you can go to chrome://settings and find Manage search engines option.
- First, look at the list of search engines and find the one you want to set as default. Click the three dots next to it and select Make Default.
- Finally, look through the list and eliminate suspicious entries. Right-click the three dots and select Remove from the list.
Remove push notifications from Chrome
If you want to get rid of the annoying ads and so-called push-notifications viruses, you must identify their components and clean your browser. You can easily remove ads from Chrome by following these steps:
- In Google Chrome, press on Menu (upward arrow) in the top-right corner of the window.
- Select Settings.
- Go to Privacy and Security > Site Settings.
- Open Notifications.
- Here, go to the Allow list and identify suspicious URLs. You can either Block or Remove by pressing on the three vertical dots on the right side of the URL. However, we suggest the Block option, so the site won't ask you to enable the notifications if you ever visit it again.
Reset Google Chrome browser
- The final option is to reset Google Chrome. Type chrome://settings in the URL bar, press Enter and then scroll down until you see Advanced option. Click it and scroll to the bottom of the settings.
- Click Restore settings to their original defaults.
- Click Restore settings to confirm.
Remove Nextyourcontent.com ads from Mozilla Firefox
Remove unwanted add-ons from Firefox
- Open Firefox and type about:addons in the URL bar. Press Enter.
- Now, click on Extensions (in the left section).
- Click Remove next to every suspicious browser add-on that you can't remember installing.
Change Firefox Homepage
- In Firefox address bar, type about:preferences and hit Enter.
- Look at the left and click the Home tab.
- Here, delete the suspicious URL and type or paste in the URL of a website you'd like to set as your homepage.
Alter preferences in Firefox
- Type about:config in Firefox address bar and hit Enter.
- Click I accept the risk! to continue.
- Here, type in the URL which has taken over your browser without your knowledge. Right-click each value that includes it and choose Reset.
Remove annoying push notifications from Firefox
Suspicious sites that ask to enable push notifications gain access to Mozilla's settings and can deliver intrusive advertisements when browsing the Internet. Therefore, you should remove access to your browser by following these simple steps:
- In Mozilla Firefox, click on Menu (the three horizontal bars) on the top-right corner of the window, then choose Options.
- Click on Privacy and Security, then scroll down to Permissions section.
- Here, find Notifications and click Settings button next to it.
- Identify all unknown URLs and choose to Block them. Click Save Changes afterward.
Reset Mozilla Firefox
- In Firefox, type about:support in the address bar and press Enter.
- Click on Refresh Firefox...
- Click Refresh Firefox again to confirm.
Remove Nextyourcontent.com ads from Microsoft Edge
Remove suspicious extensions:
- Open MS Edge browser and click on the three dots button in the top right corner, then click on Extensions.
- Look through the list of installed extensions and find the ones you can't remember installing or simply suspicious-looking ones. Right-click on them and choose Uninstall. Then confirm by pressing Uninstall again.
Change MS Edge Start Page and default search engine:
- Click on the three dots again and go to Settings. First, make sure that you choose to Open Microsoft Edge with A specific page or pages option. Then click the X next to suspicious URLs and type in the one you want to set as your homepage. Click the Save icon to confirm.
- Click on the three dots > Settings. Scroll down and click on Show Advanced Settings. Then scroll down until you find Change search engine button. Click it. Here, select the search engine you prefer using and click Set as default.
Additionally, we recommend selecting and Removing suspicious search engines.
Turn off push notifications in Edge
If you keep receiving pop-up ads or other promotional content while browsing on Microsoft Edge, your browser might be corrupted by a potentially unwanted program (PUP). You have to clean it — follow these easy instructions:
- In Microsoft Edge, open Menu (three horizontal dots) in the top-right corner of the screen and click Settings;
- Click on Advanced settings.
- Scroll down to the Website permissions section. Here, click Manage permissions.
- Find Notifications and Remove all suspicious websites.
Clear browsing data
- Click on the three dots in the top right corner again and click on Settings. Find Clear browsing data section and click Choose what to clear button.
- In the next window, select all options and click Clear.
Remove Nextyourcontent.com ads from Safari
Uninstall suspicious Safari extensions
- Open Safari and click on Safari button in the top left corner. Select Preferences in the menu that appears on the screen.
- Now, go to Extensions tab. Look at the left to see all installed extensions, click on suspicious ones and hit that Uninstall button as shown in the picture. Confirm your choice by clicking Uninstall again. Repeat until you get rid of all unwanted extensions.
Change Safari Homepage and default search engine
- In Preferences, open the General tab. Here, check what URL is set as your homepage. Delete it and type in whatever URL you want to set as your Safari Start Page.
- Next, go to the Search tab. Here, choose what Search engine you want to set as default.
- Next, click on Manage websites... then Remove all... and then Done.
Remove push notifications on Safari
Some suspicious websites can try to corrupt your Safari by asking to enable push notifications. If you have accidentally agreed, your browser will be flooded with various intrusive advertisements and pop-ups. You can get rid of them by following this quick guide:
- Open Safari and click on Safari button in the top-left corner of the screen to select Preferences;
- Go to Websites tab and navigate to Notifications on the left side toolbar.
Reset Safari
- Click on Safari > Clear History...
- Then choose to clear All history and hit Clear History button to confirm.
- Go to Safari > Preferences and then open Privacy tab.
- Click Manage Website Data... then Remove All. To finish, click Done.
- Finally, clear Safari cache. In Safari Menu, click Develop > Clear Cache.
Remove Nextyourcontent.com ads from Internet Explorer
TIP: If you are still using IE, we strongly advise using Microsoft Edge or a different browser because Microsoft is no longer providing technical or security support for IE browser.
Remove suspicious extensions from IE
- Now, go back to Toolbars and Extensions.
- Below Show:, select All add-ons.
- Right-click suspicious extensions and choose Disable, or, if available - Remove.
- If any pop-up appears, confirm your choice.
Change default search provider and remove suspicious ones
- Open Internet Explorer and click on the gear icon in the top right of the window.
- Then select Manage Add-ons.
- Here, click on Search Providers tab.
- Here, we recommend setting Bing, Google or another trusted and well-known search provider as default. To do it, right-click the provider and choose Set as default.
- Now you can right-click suspicious search providers and choose Remove.
Change IE Home Page
- In Internet Explorer, click the gear icon in the top left corner.
- Choose Internet Options.
- Change Home Page URL to whatever page you want to use as your homepage.
- Click Apply.
- Click OK.
Block pop-up notifications on Internet Explorer
Suspicious websites can gain access to your Internet Explorer browser through push notifications. If you enable them even by accident, you will start receiving numerous annoying ads and other advertising content while browsing. The easiest way to remove push-notification viruses is by performing the following steps:
- In Internet Explorer, click on the Menu (the gear button) on the top-right corner of the window, then select Internet Options.
- Go to the Privacy tab;
- Look for Pop-up Blocker section and select Settings;
- Scroll through all URLs and you can Remove them one by one or all at the same time. Click Close.
Reset Internet Explorer
- Click the gear icon in IE menu > Internet Options. Now click on Advanced tab.
- Under Reset Internet Explorer settings, click Reset...
- Click on the checkbox next to Delete personal settings.
- Click Reset.
- To finish, click Close.
Alternative software recommendations
Malwarebytes Anti-Malware
Removing spyware and malware is one step towards cybersecurity. To protect yourself against ever-evolving threats, we strongly recommend purchasing a Premium version of Malwarebytes Anti-Malware, which provides security based on artificial intelligence and machine learning. Includes ransomware protection. See pricing options and protect yourself now.
System Mechanic Ultimate Defense
If you're looking for an all-in-one system maintenance suite that has 7 core components providing powerful real-time protection, on-demand malware removal, system optimization, data recovery, password manager, online privacy protection and secure driver wiping technology. Therefore, due to its wide-range of capabilities, System Mechanic Ultimate Defense deserves Geek's Advice approval. Get it now for 50% off. You may also be interested in its full review.

Disclaimer. This site includes affiliate links. We may earn a small commission by recommending certain products, at no additional cost for you. We only choose quality software and services to recommend.

Norbert Webb is the head of Geek’s Advice team. He is the chief editor of the website who controls the quality of content published. The man also loves reading cybersecurity news, testing new software and sharing his insights on them. Norbert says that following his passion for information technology was one of the best decisions he has ever made. “I don’t feel like working while I’m doing something I love.” However, the geek has other interests, such as snowboarding and traveling.
Recent Posts
Remove VLFF Ransomware Virus (DECRYPT .vlff FILES)
VLFF ransomware is a virtual menace to your computer files VLFF ransomware is a newly…
Remove UIGD Ransomware Virus (DECRYPT .uigd FILES)
UIGD ransomware encrypts all files on a computer, asks for a ransom UIGD ransomware is…
Remove EYRV Ransomware Virus (DECRYPT .eyrv FILES)
EYRV ransomware takes your computer files hostage, demands a ransom EYRV ransomware is a destructive…
Private Internet Access Review 2022: Fast, Secure & Cheap VPN
Private Internet Access (PIA) VPN maintains its long-term role as a leader Private Internet Access…
Remove XCBG Ransomware Virus (DECRYPT .xcbg FILES)
XCBG ransomware aims to lock your files and demand a ransom XCBG ransomware is a…
Remove BPQD Ransomware Virus (DECRYPT .bpqd FILES)
BPQD ransomware encrypts all computer files, demands a ransom from the user BPQD ransomware is…