Release and Renew IP address and fix network connectivity problems
Contents
Release/Renew IP address is a procedure meant to solve network connectivity issues related to cached IP information. It can be done via Command Line on Windows or System Preferences on Mac OS. Release and Renew IP address means giving up the lease of DHCP IP address of the host computer and making a request for a new IP address. First of all, the ipconfig /release command is used to give up current IP lease and send the server a DHCP alert to mark the old IP address as available. The second command – ipconfig /renew requests a new IP address.
These commands help to solve network connectivity problems that arise due to expired IP addresses or other minor computer bugs. It can help to solve IP-related issues and restore fully-functioning network connection instantly.

Release/Renew IP commands are usually followed by Flush DNS command, which clears DNS cache and makes requests use new IP address information.
Related: How to Flush DNS Cache on Windows, Mac, Linux?
Follow the guide below to release and renew ip address on Windows 10, 8, 8.1, 7, Vista, XP, Mac and Linux. Make sure that your network adapter needs to be configured to Obtain IP address automatically, otherwise these commands won’t work.
How to Release and Renew IP Address on Windows, Mac, Linux
Windows 10, 8.1 and 8
To release and renew IP address on Windows 10, 8.1 or 8, follow the steps given below.
- In Windows 10, 8 or 8.1, use Windows search to find Command Prompt.
- Right-click on Command Prompt and select Run as Administrator option.

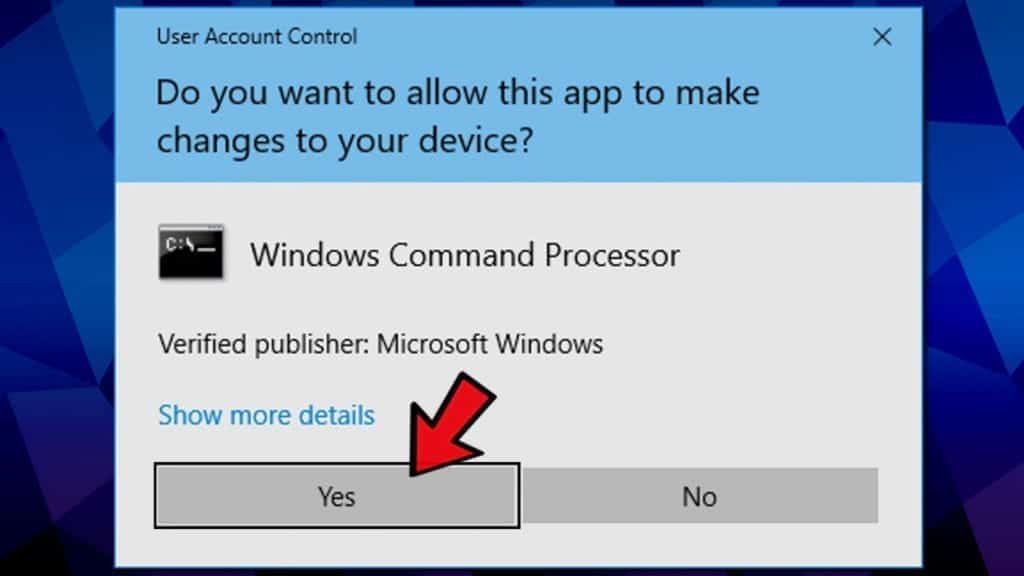
- In User Account Control pop-up, click Yes.
- In CMD, type ipconfig /release and press Enter.
- Next, type ipconfig /renew and press Enter.

- Wait until the DHCP server assigns a new IP address to you.
Windows 7 and Vista
Follow these steps to use ipconfig /release and ipconfig/renew commands on Windows 7 or Vista.
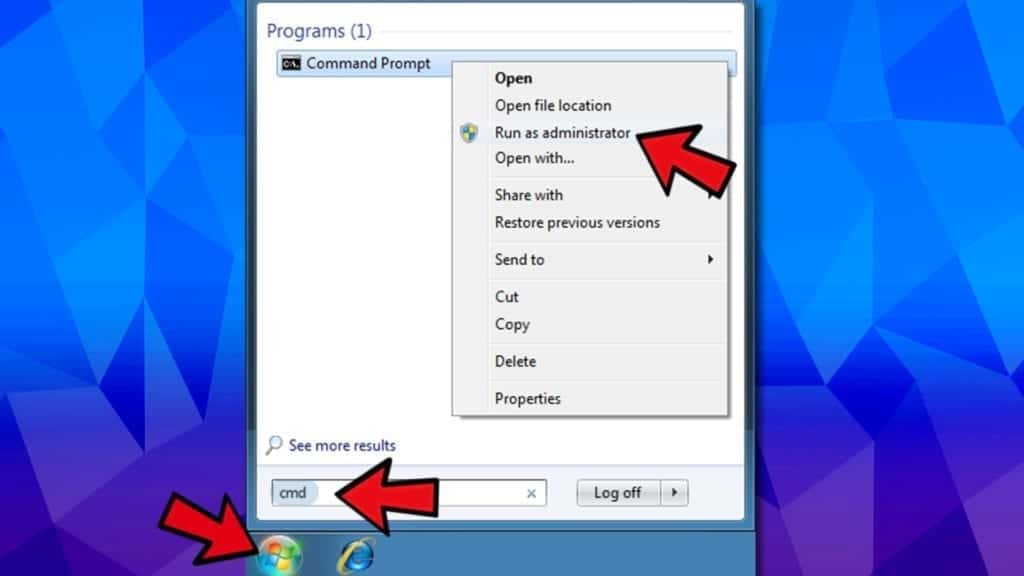
- Click on Windows menu, then type cmd in Windows search bar.
- Right-click the Command Prompt result and choose Run as Administrator from the menu.
- In User Account Window, click Yes.
- Now type the following command in the Command Prompt: ipconfig /release and press Enter.
- Type ipconfig /renew and press Enter.
Windows XP
- Press START>All Programs>Accessories. Right-click Command Prompt and choose Run As…. Choose Administrator‘s account and enter password for it. Press OK.

- In Command Prompt, type ipconfig /release and press Enter.
- Now, type ipconfig /renew and press Enter to finish.
Mac OS
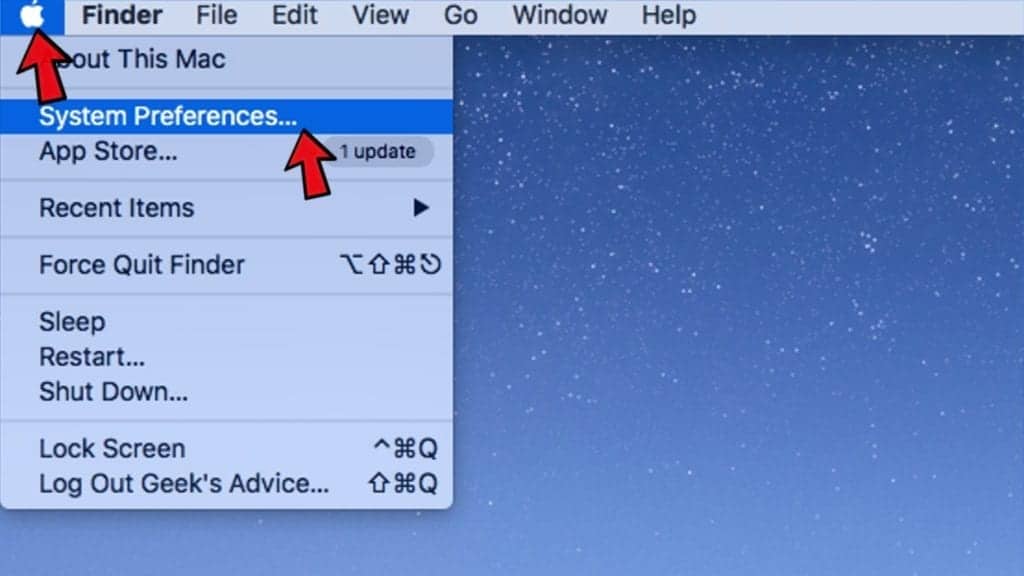
- Click the Apple logo in the top-left corner of the screen and select System Preferences.
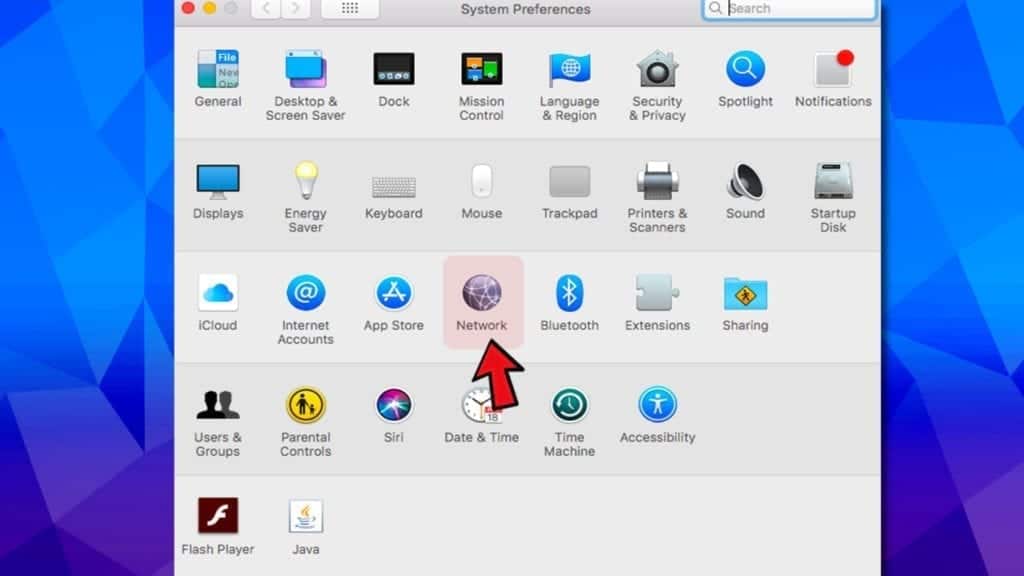
- Now, go to Network.
- On the left pane, select Wi-Fi or Ethernet (depending on which one you’re using). Then click Advanced… button on the right side of the Network menu.

- Select TCP/IP tab. Here, you should see that Configure IPv4 is set to Using DHCP. Click Renew DHCP Lease button.
- Wait a couple of seconds until you see a change in IPv4 address. The process is done now.
Linux/Ubuntu
The guide below provides an equivalent of ipconfig /release and ipconfig /renew commands on Linux. Use these steps to force DHCP Client to Renew IP Address.
- Press CTRL+ALT+T to launch Terminal on Linux.
- In Terminal, type sudo dhclient – r and press Enter to release current IP.
- Then type sudo dhclient and press Enter to get a new IP address from DHCP server.

Useful DNS Resolver Commands for Windows
In addition to Renew and Release IP commands, you might want or need to use some of the commands listed below.
- ipconfig /flushdns. This command helps to clear the DNS Resolver cache so that the new IP information would be fetched instantly.
- ipconfig /registerdns. This command refreshes all DHCP leases and registers DNS names from scratch.
- ipconfig /displaydns. Shows current contents stored in DNS Resolver Cache.
Fix IPconfig release renew not working
IPConfig /Release and /Renew commands work only if your network adapter is set to fetch the IP address automatically. In other words, you need to have DHCP enabled. You can configure these settings via Windows Network and Sharing Center.
1. Go to Network and Sharing Center, then select Change adapter settings.
2. Right-click your network adapter and open Properties.
3. Find Internet Protocol Version 4 ( TCP /IPv4) and click Properties.
4. Select Obtain IP Address automatically and click OK to save.

Norbert Webb is the head of Geek’s Advice team. He is the chief editor of the website who controls the quality of content published. The man also loves reading cybersecurity news, testing new software and sharing his insights on them. Norbert says that following his passion for information technology was one of the best decisions he has ever made. “I don’t feel like working while I’m doing something I love.” However, the geek has other interests, such as snowboarding and traveling.
Has anyone found a way to do this on Chrome OS without leaving user mode?